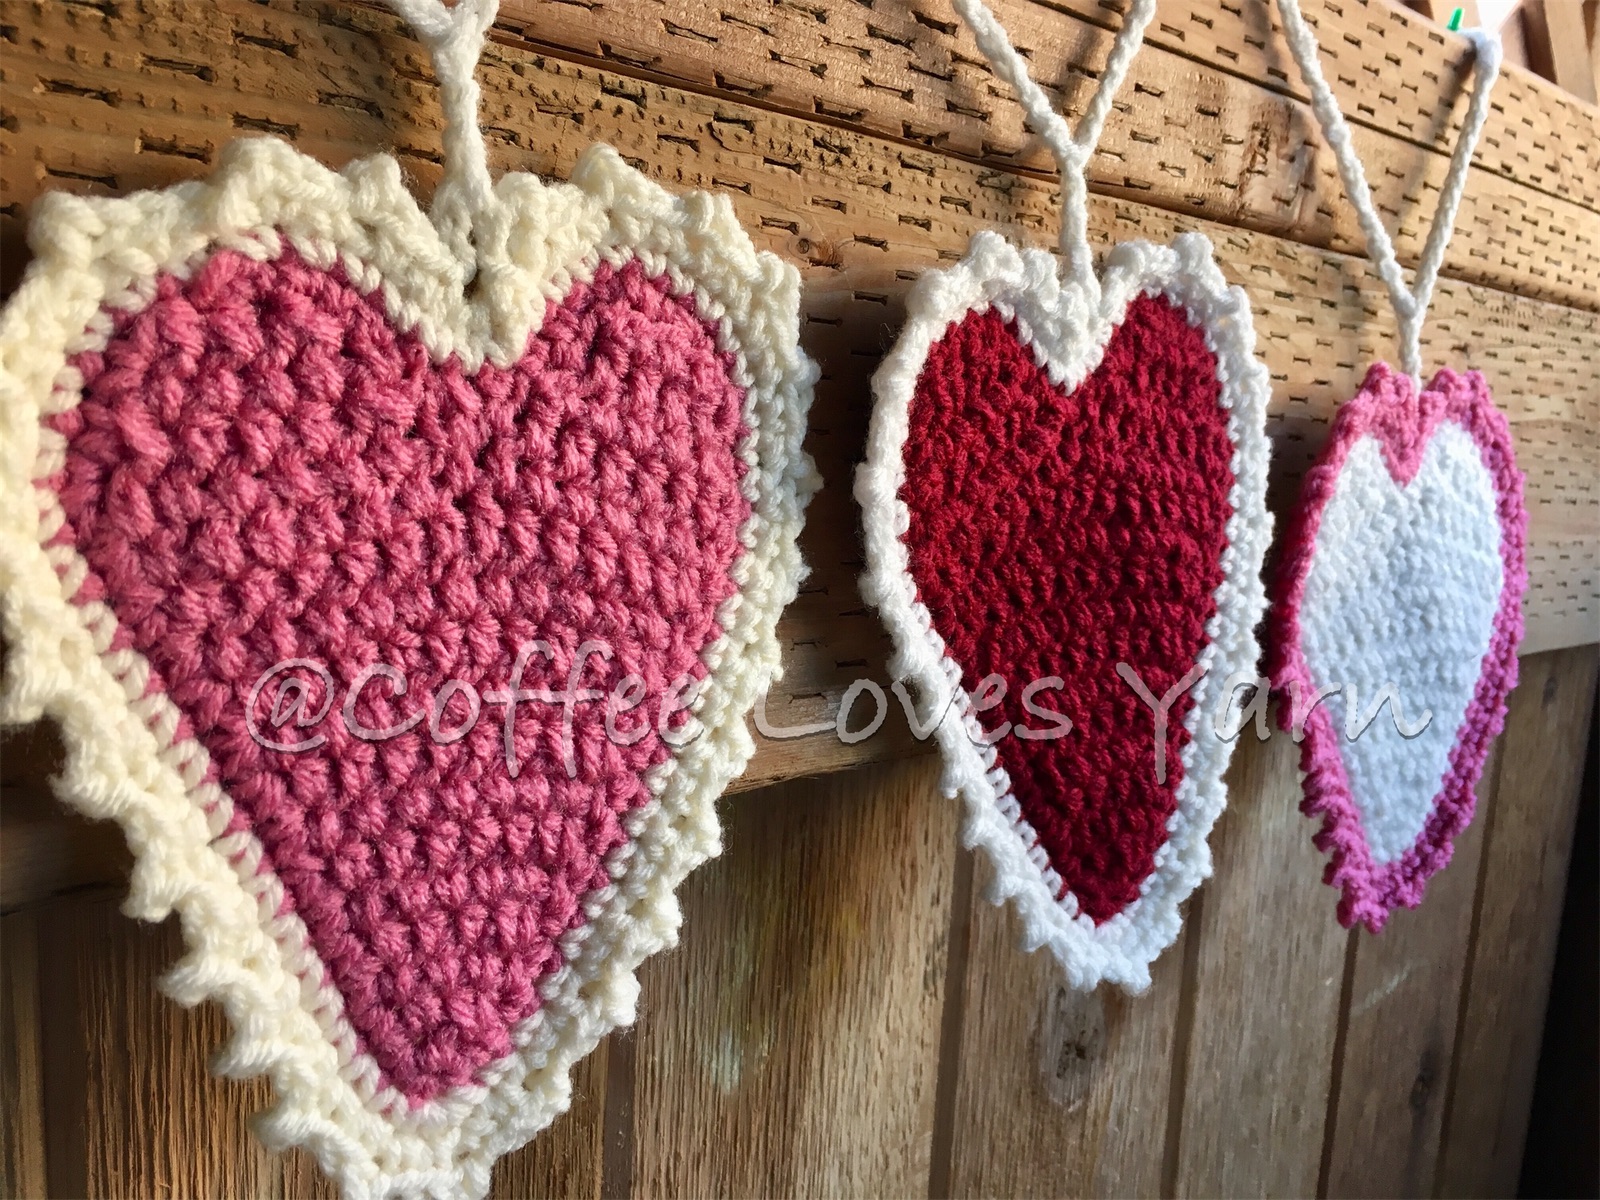


Love is in the air and I am here to share some of it! Last Spring, I began hanging a garland over the entry of my dinning room. I made a banner for spring, 4th of July, Fall and some Christmas lights. It was so much that I decided to continue and design some of my own. The house looks empty now that all the Christmas decorations are put away so I decided to add some hearts to liven up the place. This pattern is easy to work up and uses the “half-double crochet in-between half-double crochets” method. I’m not sure if that’s the official name but I’ll go with that! It helps ger rid of those little ridges that form when you use the half-double crochet stitch. I have included a link to a great video by Daisy Farm Crafts that should help you.
This pattern has an optional version you can use to make some lovely coasters. As a matter of fact, you can use it as an applique on a blanket or any project you need a heart for. Simply adjust your yarn and hook to get the size desired. Have fun!
You are welcome to sell any finished products you make with this pattern. Whenever possible, please give Coffee Loves Yarn credit for the design. You many not, however, claim this pattern as your own. If sharing this pattern, please link this blog post to direct users back to Coffee Loves Yarn. Thank you for understanding!
Please read through pattern and notes before beginning. This pattern has been tested. If you find any mistakes or need clarification, please feel free to contact me and I will reply as soon as possible.
Carolina
Be Mine Bunting/Garland
By Coffee Loves Yarn
Materials:
- 5.0mm or H hook
- Worsted weight yarn (I used Red Heart Supper Saver but you can use any kind you like. If you are making the optional coasters, I recommend using cotton yarn because it’s absorbent and heat-resistant).
- Yarn Needle
- Scissors
Notes:
- Gauge is not important. Use the yarn size and hook that makes the size heart you need.
- The stitch count for each row will appear in ( ) at the end of the row.
Stitches:
- St – stitch
- Ch – chain
- Sc – Single Crochet
- Sc2tog – single crochet two stitches together
- Sc3tog – single crochet three stitches togehter
- Hdc – half-double crochet (see notes above)
- Hdc2tog – half-double crochet two stitches together
- 2hdc – two half-double crochet into the same stitch
- Slst – slip stitch
- Sk – skip the next stitch
Special Stitches:
- Special Stitches: for the heart, I recommend putting your half-double crochets in-between the half-double crochets from the previous row. I have included some pictures for instruction or you can watch this video here.
- Picot: Ch2, slst into second ch from hook
Heart (make as many as you need for your garland/bunting)
Ch2
Row 1: 2hdc into the second ch from hook, ch1, turn (2)
** From this point on, all hdc will be worked in-between each hdc from the row below. See PICTURE #1 or notes above for more information and a video.
Row 2: 2hdc into each st across, ch1, turn (4)
Row 3: hdc across, ch1, turn (4)
Row 4: 2hdc into the first st, hdc into the next two sts, 2hdc in the last stitch, ch1, turn (6)
Row 5: hdc across, ch1, turn (6)
Row 6: 2hdc into the first st, hdc across up to last st, 2hdc into the last st, ch1, turn (8)
Row 7: hdc across, ch1, turn (8)
Row 8: 2hdc into the first st, hdc across up to the last st, 2hdc into the last st, ch1, turn (10)
Row 9: hdc across, ch1, turn (10)
Row 10: 2hdc into the first st, hdc across up to the last st, 2hdc into the last st, ch1, turn (12)
Row 11: hdc across, ch1, turn (12)
Row 12: 2hdc into the first st, hdc across up to the last st, 2hdc into the last st, ch1, turn (14)
Row 13: hdc across, ch1, turn (14)
Row 14: hdc into the next seven sts, leaving the remaining sts unworked, ch1 turn (7)
Row 15: hdc2tog, hdc into the next three sts, hdc2tog, ch1, turn (5)
Row 16: hdc across, ch1, turn (5)
Row 17: hdc2tog, hdc into the next st, hdc2tog (3)
Fasten off and weave in any loose ends.
Attach yarn to the other end of the heart where the unworked sts begin.
Row 18: ch1, hdc into the seven unworked sts, ch1, turn (7)
Row 19: hdc2tog, hdc into the next three sts, hdc2tog, ch1, turn (5)
Row 20: hdc across, ch1, turn (5)
Row 21: hdc2tog, hdc into the next st, hdc2tog (3)
DO NOT FASTEN OFF OR TURN
Row 22: Ch1, sc evenly around the entire edge of heart. Make sure you do 3sc on the bottom stitch of the heart to avoid it bunching up (see PICTURE #2). Slst into the first st of border ** If you would like to close the gap between the two bumps of the heart, you may sc2tog the two stitches in the “valley” of the heart (between the two bumps at the top of the heart).
Fasten off and weave in any loose ends. If desired, continue with border.
Border:
Using a slst, attach a different colored yarn to the st on the right of the middle stitch of the “valley” (see PICTURE #3).
Row 1: Ch1, sc into the same st. Sc in each st around, making sure to put three sc into the bottom tip of the heart (see PICTURE #2).
Slst into the first st. Do not turn work.
The number of stitches will depend on how many you worked in row 22. My hearts came out to have 58 sts.
Row 2: Ch5, sk the middle stitch in the “valley”, slst into the next st. *sc into the next st, picot, sc into the next* repeat between * * around and slst into the first st. (approximately 27 picots and one ch5 loop).
Fasten off and weave in any loose ends.
Chain: (for connecting and hanging up garland/bunting)
Chain 8, slst into first ch.
Ch 15. Inserting your hook from the front, make a DC into the ch5 loop of your first heart.
Continue in this manner, chaining 35 in-between each heart or any number of stitches to reach the desired spacing. This will vary depending on where you plan on hanging the garland/bunting so keep re-doing if need be until you get it the way you want. Once you have attached the final heart, ch 23, slst into the 8th chain from hook.
Fasten off and weave in any loose ends.
Coaster:
To make this into a coaster, follow the same pattern and simply leave off the ch5. Instead, sc into those three stitches and continue the rest of the pattern as written.
PICTURE #1
A: regular stitch
B: Space between hdc stitches

PICTURE #2

PICTURE #3

